What To Do If You Don't Fit The Left AIC Pattern
Sep 30, 2022
One of the most common questions regarding natural human asymmetry I get is "I watched your PRI Left AIC Pattern content, but what should I do if I feel like I'm the opposite?"
Don't worry - this is not abnormal. It's important to keep in mind that the Left AIC pattern is the baseline layer of human asymmetry, but that doesn't mean we all stay there.
If you haven't watched my Left AIC content, I highly suggest doing that first here so that you understand the rest of this article:
In this article I'm going to discuss:
- The expected presentation of a Left AIC
- Two common asymmetrical presentations other than the Left AIC
- Solutions and strategies for improving these patterns
The Left AIC Pattern: The Baseline
Unless you are born with a significant structural abnormality (such as Situs Inversus), then you are biased towards a Left AIC pattern where we are naturally right-side dominant.
There's a reason why most people are right-handed. We have brain, organ, and gravitational influences creating a bias of us leaning over towards the right side. More on that here in my Left AIC video.
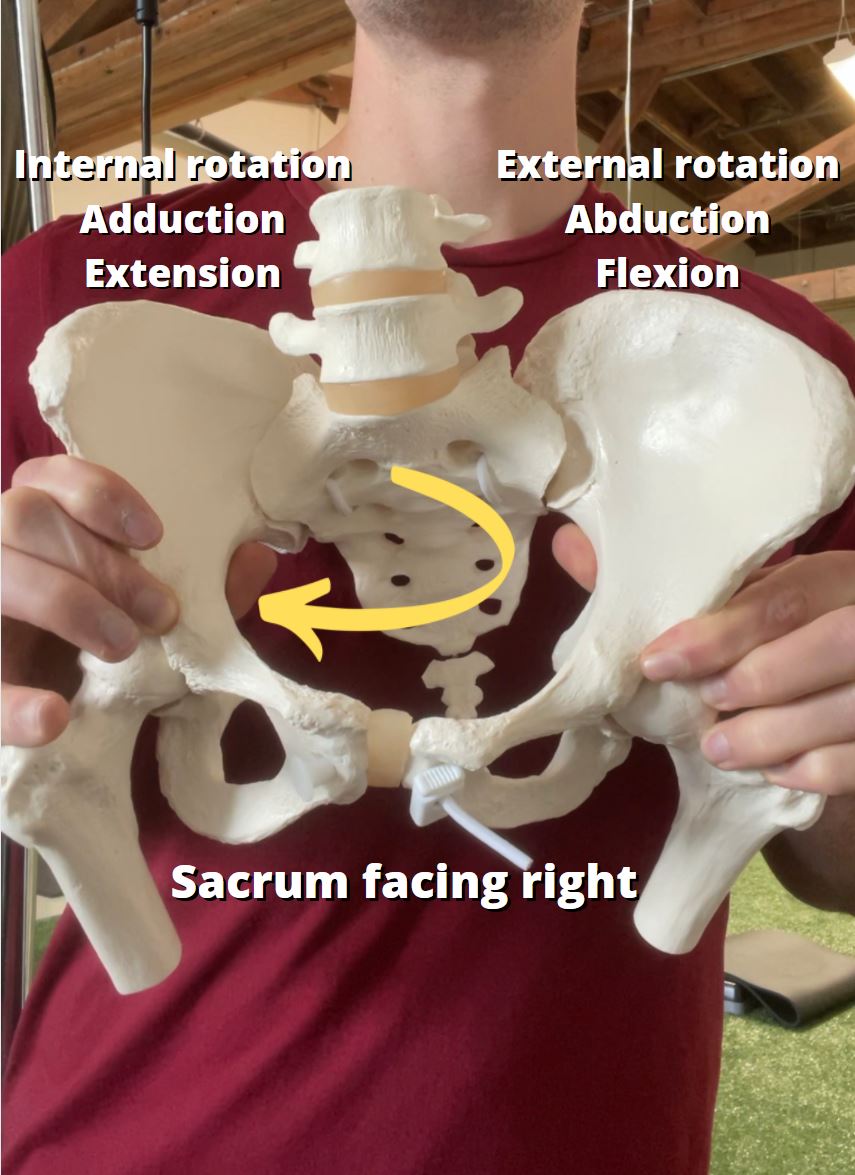
What we have is a pelvis that's biased towards a sacrum that is turned right with a right innominate bone in:
- Internal Rotation
- Adduction
- Extension
And on the on the left it's biased towards:
- External Rotation
- Abduction
- Flexion
Because of this, we would expect to see the following measurements in range of motion testing:
Femoral Internal Rotation: Right > Left
Femoral External Rotation: Left > Right
Straight Leg Raise (measurement of pelvic internal rotation): Right > Left
Hip Flexion (measurement of pelvic external rotation): Left > Right
At the upper body, we have a right side that has:
- Scapula moved away from the spine
- Biased towards internal rotation
- Compressed front-side ribs
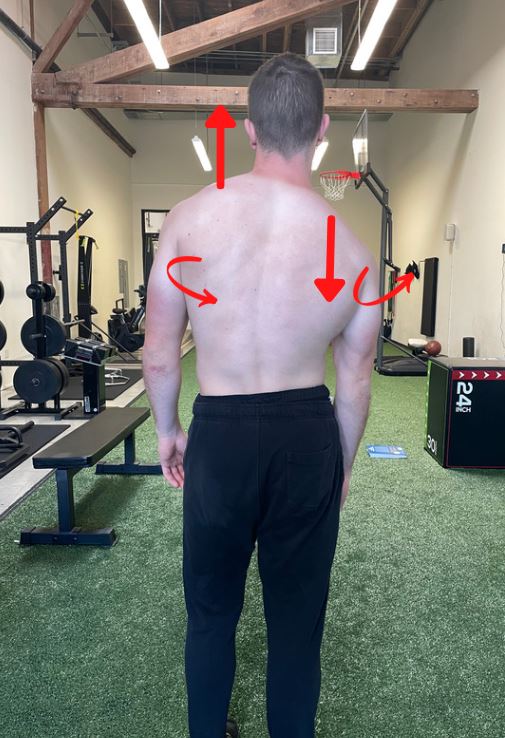
On the left side we have biases towards:
- Scapula moved towards
- Biased towards external rotation
- Compressed back-side ribs
- More flared ribs on the front side

This would result in:
Shoulder Internal Rotation: Left > Right
Shoulder External Rotation: Right > Left
Shoulder Abduction (measurement of how well we can turn our trunk to one side): Right > Left
Shoulder Flexion (measurement of mostly posterior ribcage expansion): Right > Left
Trunk Rotation: Left > Right
But what if we don't match this?
Asymmetrical Compensation #1: Oblique Orientation
Some of you reading this may be asking, “Well, what if my left hip is higher?”
You very well may be correct. It’s impossible to know exactly why someone would compensate into a higher left hip, but the common causes I have seen correlations with are:
- Injury to the right side of the body – particularly significant ankle injuries because they limit our body’s trust to load that side of the body
- Lifestyle or exercise that require a repetitive shift into the left side
- Genetics
In this pattern, the higher left hip limits range of motion on both the left and right sides. In this context, we refer to them as Oblique Orientations (credit to Bill Hartman for this term), as the pelvis slowly begins to orient itself as a whole on that oblique, or "diagonal" axis:

This is the other type of lateral pelvic tilt where the left hip is higher. In this case, the left hip is coming “up and over the top”.
This is a case where the left hip now very far forward, but the now also higher than the right.
The result of this means that we will have different assessment outcomes. Primarily:
- Straight Leg Raise: L > R
This is because of how the asymmetrical pelvis position biases us towards a pelvis that is very far forward on the left.
If you look at enough people doing straight leg raises, you'll notice that when they start to compensate, they will start "rolling" their pelvis away from that side to find more range of motion, but it's important to keep in mind that this is not genuine internal rotation - it's them trying to find more range of motion they don't have via moving through their low back which causes them to move their pelvis as a whole unit:
- Shoulder Flexion & External Rotation: L > R
This is also because of how they are positioned on the floor or table. Remember that in this position, they are very forward on the left side, which is going to create a lot of extension on the left side of the pelvis. This creates a situation where they are lying down in a state of a lot of flexion which can give the impression they have more range of motion than they actually have:
In reality, they are just orienting their whole body backward through their spine, similar to how they orient their whole pelvis to one side in the straight leg raise.
Solutions for the Oblique Orientation
Step 1: Improve Pelvic Neutrality on Both Sides
Generally it's going to be helpful to "bring them back on both sides" in their pelvis. The more forward the left hip goes, the more it will take the right side with it.
Getting them out of that anterior pelvic tilt on both sides will be helpful for restoring more ability to shift from side-to-side later on. Here are two drills you can do for that:
Technique used with permission. Copyright © Postural Restoration Institute®2022. www.posturalrestoration.com
Technique used with permission. Copyright © Postural Restoration Institute®2022. www.posturalrestoration.com
Step 2: Push From Right-To-Left
After that, we need to facilitate a push from right-to-left in the pelvis and upper body. Because the pelvis is so turned right, we need to push out of the right side.
In my Biomechanics Course, I have literally dozens of different ways we can do this and how to best go about this for specific cases, but here are two exercises I get great results with if applied correctly:
We will know if we are successful with these exercises if:
- Straight leg raise becomes more symmetrical
- Shoulder flexion and external rotation become more symmetrical
It may not be 100% symmetrical, but it should be a noticeable improvement that should get us off to a good start.
Step 3: Pull Back on Left
Now that we have more symmetry, we want to help "pull the left side back" with muscles that help us shift left such as:
- Hamstrings
- Adductors
- Obliques
We can do that with the following exercises:
Technique used with permission. Copyright © Postural Restoration Institute®2022. www.posturalrestoration.com
Technique used with permission. Copyright © Postural Restoration Institute®2022. www.posturalrestoration.com
Scenario #2: Shifting To The Left
In more rare circumstances, we can actually have a person present if they are genuinely shifted over to the left and in the direct inverse pattern of the Left AIC.
I first learned about this from those who founded this pattern: James Anderson and Mike Cantrell from Applied Integration Consulting through their PRI Performance Program (which is absolutely awesome, by the way).
They officially named this the Repetitive Rotation Superior T8 Syndrome pattern.
They describe this pattern as more common in those who have heavy rotational demands on their body such as baseball players and throwing athletes.
That doesn't mean it can't happen in your average Joe - it absolutely can and does. It's just more common when lots of rotation is present in their lifestyle.
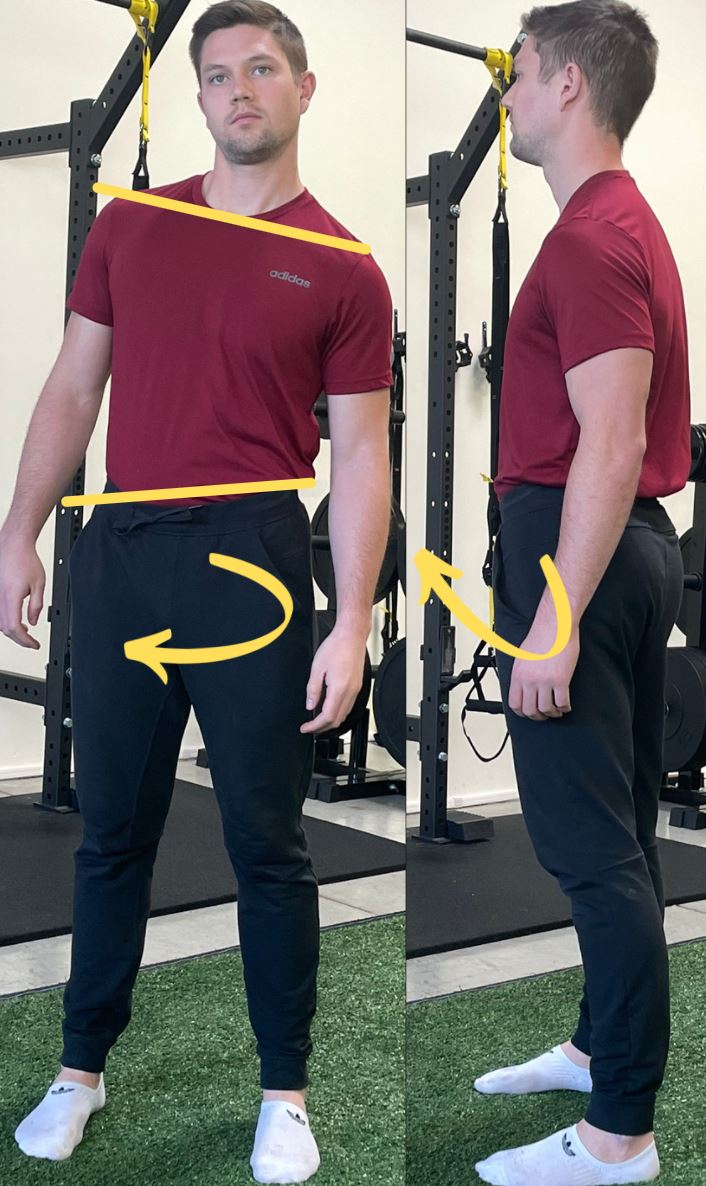
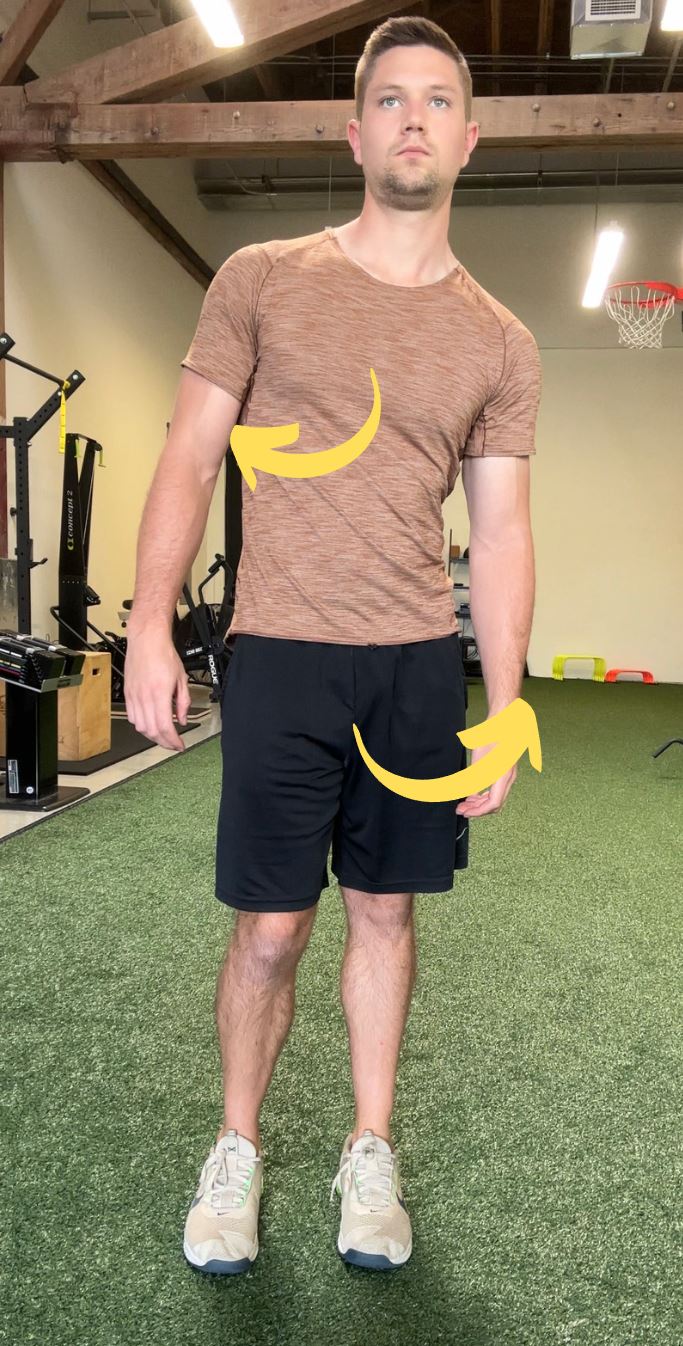
In this case, they will present visually with:
- More flared right ribs
- A higher left hip
- A lower left shoulder
In terms of assessments, they will have:
- Femoral Internal Rotation: L > R
- Femoral External Rotation: R > L
- Straight Leg Raise: L > R
- Hip Flexion: R > L
- Shoulder Abduction: L > R
- Trunk Rotation: L > R
Which is literally the exact opposite of what we'd expect!
With these individuals, they started with the Left AIC but have large degrees of compensation present.
They often require a more individualized approach, but the key difference here is we need to give them a right side first before giving them exercises for a Left AIC.
Step 1: Give them right stance
Think of this as "giving them back what they should have" in the first place which is a right-side dominance.
There are specific exercises for this that help facilitate muscles that pull us into the right side in stance phase of gait like the hamstrings, adductors, and obliques mentioned above:
We will know if we are successful when we see improvements in:
- Right hip internal rotation
- Right straight leg raise
- Right shoulder flexion
- Right shoulder abduction
Step 2: Get out of right side
Now that they can "get in" their right side, we want to educate them how to "get out" of it. This requires use of the hip external rotators and abductors like the glute max and gluteus medius.
We also want to progress them to activities that are more integrated and challenging such as:
This technique is a modified version of the Left Sidelying Left Flexed FA Adduction with Right Extended FA Abduction and Left Abdominal Co-Activation technique from the Postural Restoration Institute®. www.posturalrestoration.com
Step 3: Shift left
After Step 2, things should be looking more and more symmetrical, and the Left AIC pattern should begin to be more apparent.
At this point, improving the ability to shift genuinely to the left after pushing out of the right side will be important.
Drills mentioned above for establishing left stance can be helpful, but at this point we would also likely be doing more integrated, upright activities.
Summary
Unless you were born with a significant abnormality, we all start with the Left AIC. However, that does not mean that is where you are today.
Using assessments can help us understand where someone is limited in their movement capabilities. Over time, we want to remove layers of compensation one-by-one as they build over time to finally address the underlying Left AIC pattern.
Don’t miss out on free education
Join our email list to receive exclusive content on how to feel & move better.
